[All-in-one] Adobe Illustrator
Workspace Overview

Step-by-Step Guide

This guide is going to teach you all about Adobe Illustrator Workspace. Let’s see what we are going to cover today:

  1. What is the first screen when AI opens
  2. Application Bar
  3. Control Panel
  4. Artboard
  5. Toolbar
  6. Bottom Bar
  7. Features Panel
  8. Create your own workspace

Lots of tips and tricks.

And some hidden features that no one has talked about yet.

Without further ado…

Topic 1:

First screen when AI opens

Adobe Illustrator is one of the top most design tools today. It was initially launched for vector image creation but it is now used worldwide for more than just vector images. You can create almost everything in Adobe Illustrator from logos to magazines. Let’s dive right in and see how we can leverage the hidden and known features of Illustrator.

This is the first screen which pops up when you open AI.

This topic will focus solely on Adobe Illustrator workspace that opens up as soon as you create a new document.

Often, a lot of details are thrown together which makes it confusing and looks like too much information.

We will club together the elements so it makes more sense.

(Oh before I forget. Lots of screenshots for your easy understanding)

Now where to start in illustrator workspace

Let’s pick a Web-large option for now and see how the workspace looks.

Topic 2:

Application Bar

The first and top most topic in Adobe Illustrator workspace overview is our application bar.

The top bar is known as the application bar in illustrator.

The first option is your “File” option just like any other software.

Click on it and it will display all the features that an illustrator file can incorporate within it i.e create a new file, open an existing file or save the file you are currently working on.

We will cover every file option in depth later. But for now, this option is used to create or open documents in your illustrator project.

Next comes up the Edit tab.

The edit tab normally comes into picture when you are working on an element of a design. 

If there is no design on the artboard (the canvas where you work on your design), a lot of options will be in deselection mode under Edit.

Edit option is also applicable if you want to change the look and feel of your workspace.

We will come to that later in this blog.

Similarly, an application bar has options like “Object” , “Type” , “Select” and “Effect” that are all applied to your design on the artboard.

If you need to change the positioning of any element in your design, you will find the option under object.

If you need to select any specific element from your design without changing the rest, you can do it by going under option select.

And so on.. But this discussion is for later.

Don’t worry, you will come to know about each option provided in AI.

But at the right time.

The last option in the Application bar is the arrangement of documents.

If you have only one AI file opened, you can click on this option but nothing will change.


But if you have multiple documents opened, this option gives you the flexibility to view these documents as you desire.


Quick Read:

99Designs has beautifully explained other colors and their significance in logo design. It’s worth a read.[10min]

Topic 3:

Control Panel

Right below the application bar, we have a control panel. Control panel acts as a helping hand to modify your elements, your logo designs or any sort of designs in a manner you would like to see.

If no design is selected, it will show you the default control panel.

On the left side, it also states if there is any selection or not.

But we will cover the control panel in depth very soon.

Coming back to the workspace…

Topic 4:

Artboard

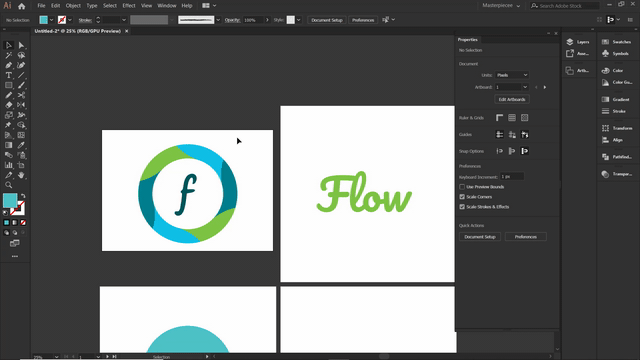
In the centre, we have what illustrator calls an artboard.

Artboard is the canvas area where you create your logo designs.

Sure you can create outside the artboard as well, but the final design file exported should only have the design on the artboard.


Topic 5:

Toolbar

The next topic in our Adobe Illustrator workspace overview is toolbar.

On the left side, we have our default toolbar.

Toolbar is the source which helps you create designs. And the control panel lets you make edits to the selected design portions.

You can make changes to the toolbar as and when you start using it frequently.

You can make it short.

Or make it super long with the options you often work on.

For now all we need to know is, the toolbar is an essential aspect of any workspace.

As without it, you can not create any designs.

Topic 6:

Bottom Bar

At the bottom, we have properties related to how we view the artboard in the centre.

First option lets you zoom the artboard upto 64000%.

This helps when you are working on a very complex design and need to make edits to the smaller elements.


Next option takes you to the desired artboard. This works if your project has multiple artboards.


Right beside this artboard selection, we have the description of the currently selected option on the toolbar.


Topic 7:

Features Panel

Let’s take a look at the right panel in Adobe Illustrator workspace overview.

By default, it shows the properties/layers/libraries tabs.

Properties tab shows the document information you are currently working on.

What if you want to change the size of your artboard? Or maybe add another one?

You can do it by selecting “Edit artboards”.


If the option has a dark background, it means the option is selected for this project. 


Ruler and grids help you measure the elements and accurately move them around.

Right now, they are all deselected. Click on them and it will turn them on for your document file.

Take a look at the examples below.


Guides can help you position your design elements across the artboard.

You can either show or hide them once the purpose if fulfilled.


Snap options help you snap 2 elements to their edges or to the background hidden grids.


For now, we can keep these settings as it is. We will come to these when we start creating designs.


Topic 8:

Create Your Own Workspace

Adobe provides you with some predefined workspaces if you click on the top right corner. And the guide for Adobe Illustrator workspace overview is incomplete without creating a custom workspace.

By default, “Essentials” is always selected. 

With very minimum options on the screen.

You can select any other workspace and switch back to essentials. 

No settings will be hampered in this process.

In case you drag any panel and delete it by mistake, you can simply click “Essentials” and hit Reset Essentials. 

Everything will be set back to the default.

But that’s not it.

You can create your own workspace now that you know about it all.

Let’s start with a sample creation.

Click Essentials > New workspace.

Give your workspace a name. I gave mine “Masterpiece”.

The first thing I would change is the background color.

Go to preferences in the control panel.

Select User Interface.

And change brightness to your desired color. I use black.

Next up, I don’t like the document name to cover my screen. So I deselect the Large tabs and you would notice the preview in the background.

It would shrink your document name.

Hit OK.

Next I would go ahead and take out the layers panel.

And drop it separately on side by elongating it as it helps me view all the layers in the design elements at once.

Remember, you can add as many features on this panel as you like. 

As and when you start working on designs you would find the features you mostly use. 

Lastly, this is how my workspace looks.

Thank you all for going through the basics of adobe illustrator workspace overview.

In Conclusion, I hope you followed the creation steps and have one of your workspaces in place to get started.

Next up in the Illustrator series is toolbar basics.

Learn how you can create your own toolbar in your workspace.

Mark every alternate Thursday for a new guide.

Test Yourself.
Practice On A Sample File.